An IP blacklist is a database that monitors IP addresses notorious for sending spam or engaging in malicious activities.
If you’re an email marketer or business that depends on email for communication and growth, finding your IP on one of these lists is the last thing you want. After all, being blacklisted signals to providers that your sending infrastructure may be unreliable, which can quickly damage your business’s credibility and sender reputation.
While it’s important to know how to process the delisting, preventing being blacklisted should be a crucial part of your business. Some of the tools that can help you perform these prevention strategies are:
- Warmy.io
- Spamhaus
- MxToolbox
- SORVS
- Barracuda
- DNSBL
- Whatismyip’s Tool
- DNSChecker
- MultRDL
- Spamcop
This blog will provide the specific features of the following tools, and how they can help you remove IP address blacklists, and what are the potential advantages and disadvantages of using them.
What causes IP blacklisting?
An IP blacklist compiles IP addresses identified and flagged for engaging in suspicious or harmful online behavior, such as sending unsolicited spam emails. Common reasons that cause IPs to be blacklisted include:
- Detection of outgoing spam from the IP address
- IP is determined to be used by spammers
- Malware is present, unbeknownst even to the email user
- Sudden spike in email sending volume (sending large volumes of email especially from newly established or unknown IP)
Being included in an IP blacklist has repercussions that have a long-term effect, especially for your email deliverability and reputation. For businesses, this can translate into a direct impact on customer engagement, marketing efforts, and overall credibility.
As per Kaspersky’s report, the year 2025 observed a 15% growth in malicious email attacks like scams, phishing, and malware. This increase only proves the importance of IP blacklists.
Top 10 IP address blacklist removal tools
The following are legitimate blacklist checkers that can help you remove your IP in the blacklist. An important caveat, however, is that you should employ prevention practices before proceeding with any removal request.
|
Tool |
Primary Function |
Blacklists Checked |
Delisting Support |
Key Pros |
Key Cons |
|
Warmy.io |
Deliverability test & warm-up |
Major blacklists are scanned as part of deliverability test |
Indirect (guides, prevention) |
Free inbox placement test
Free SPF and DMARC Record generators |
No auto-removal; manual process |
|
Spamhaus |
Authoritative DB lookup |
Own DBL/SBL |
Self-service form |
Industry standard |
Complex for beginners |
|
MxToolbox |
Multi-blacklist scanner |
100+ |
Links to specific processes per list |
User-friendly, versatile diagnostics |
Paid advanced features |
|
SORBS (officially ceased June 2024) |
Spam/malware diagnostics |
Own lists |
Limited info |
Root cause details |
No direct help |
|
Barracuda |
Reputation check |
Own BRD |
Process guidance |
Security integration |
Enterprise-focused |
|
DNSBL |
Basic email blacklist scan |
Email-focused |
None |
Simple/quick |
Shallow info |
|
Whatismyip |
IP/domain blocklist checker |
DNSBL + SURBL |
None |
Instant, covers domains |
Basic only |
|
DNSChecker |
All-in-one network diagnostics |
50+ |
None |
Clean table, MX/DNS extras |
Overkill for simple checks |
|
MultiRBL |
Broad RBL/DNSBL lookup |
Many |
None |
Email test feature, thorough |
Data overload |
|
Spamcop |
Spam report & blacklist check |
Own BL |
Guidance links |
Identifies spam volume causes |
Reporting-focused |
1. Warmy.io
 1")
Warmy.io is an all-in-one email deliverability platform and blacklist monitoring is just one part of what it covers. From automated email warmup to authentication tools to domain health checks and inbox placement testing, Warmy gives senders a comprehensive view of every factor affecting whether your emails land where they should.
Key features relevant to blacklist prevention:
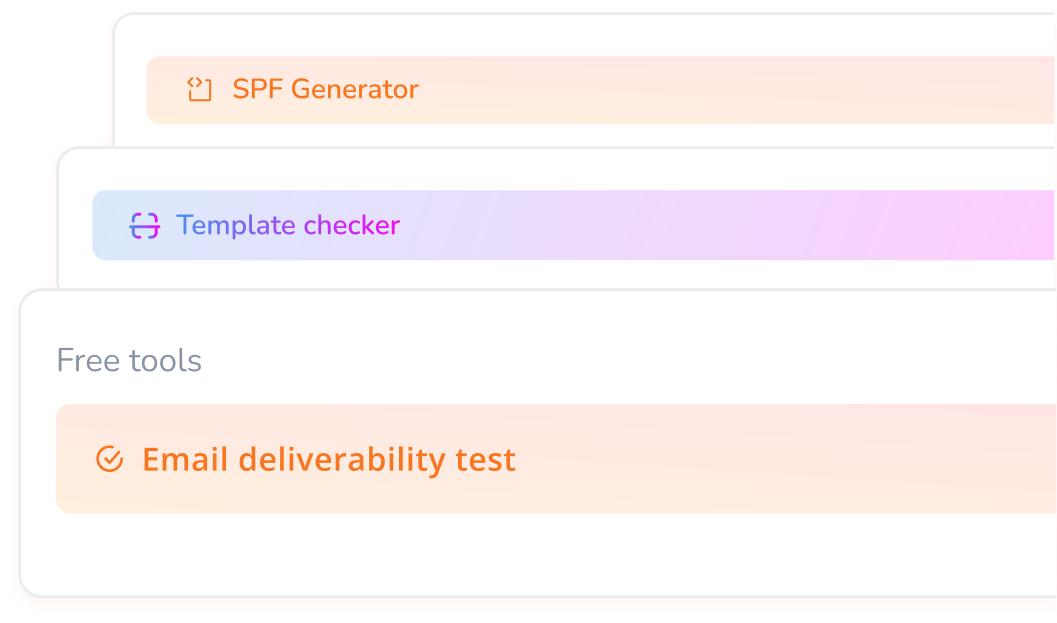
- Free Email Deliverability Test: It analyzes inbox placement across major providers — giving you a full picture of your deliverability health. The test also scans IPs/domains against major blacklists, flags issues, and analyzes spam triggers, headers, and SPF/DKIM/DMARC setup all in one place. Try it now for free.
- Automated email warmup: Gradually increases sending volume to build a healthy sender reputation by avoiding the sudden spikes that commonly trigger blacklisting. The automated email warmup also includes genuine engagement signals like opening emails, reading emails, and even rescuing them from the spam folder. These interactions further strengthen sender reputation with various providers.
- Blacklist monitoring & alerts: Real-time checks across multiple lists with instant notifications so you catch issues early.
- Authentication tools: Free SPF and DMARC record generators to resolve the authentication gaps that often prevent successful delisting.
- Built in email validation: All Warmy plans include 10,000 email validation credits, so you can clean your list before it causes a blacklisting problem.
Limitations
- Warmy doesn’t remove your IP from blacklists and no tool can actually do that automatically.
- What it does is give you the diagnostics and infrastructure to understand why you were flagged and what needs to be fixed before you submit a delisting request.
- The warmup process also solidifies your sender reputation, and combined with Warmy’s other tools, basically strips you of any possible reason to be blacklisted.
- For guidance on the actual removal process, Warmy’s blog covers step-by-step delisting instructions for all major blacklists.
2. Spamhaus
Spamhaus (and its sub-categories) is one of the most respected names in email security, widely known for its extensive and regularly updated blacklist databases. It is also widely trusted by ISPs worldwide and provides detailed information about blacklisted IPs.
How to check your IP:
- Navigate to the Spamhaus website.
- Input your IP address into the search bar and select “Lookup.”
- If your IP is clear, you’ll see a message confirming no issues. If it appears in the database, immediate action is required.
Pros:
- Comprehensive database
- Highly respected industry standard
- Detailed blacklist information.
Cons:
- Can be complex for beginners
- Primarily informative without direct delisting support.
Full guide: Spamhaus Zen Blacklist: How To Remove Your IP From It
3. MxToolbox
MxToolbox is known for its versatility, as it offers a broad suite of tools that covers blacklist monitoring, delisting support, DNS diagnostics, and server troubleshooting — making it one of the most well-rounded options on this list.
How to check your IP:
- Visit the MxToolbox website.
- Type your IP address into the search field and click “Blacklist Check.”
- The tool will immediately display your IP’s current blacklist status across multiple databases.
Pros:
- Wide range of tools
- User-friendly interface
- Effective for both monitoring and troubleshooting.
Cons: Some advanced features require a paid subscription.
4. SORBS
SORBS is a robust blacklist provider that delivers detailed information about spam and other malicious activities associated with specific IP addresses. These are all particularly useful when you need to diagnose why an IP was flagged in the first place.
While SORBS officially ceased operations as of June 2024, the standards they enforced (such as good sending behavior, strong authentication, clean lists, and engagement) are far from outdated.
5. Barracuda
Barracuda is well-known for its security-focused approach, offering IP blacklist checks as part of a broader suite of network security tools. It’s a solid option for businesses that want blacklist monitoring integrated into a wider security framework.
How to check your IP:
- Visit the Barracuda Central website.
- Input the IP address you want to check and select “Check Reputation.”
- If your IP is clean, the tool will confirm it is not currently listed as “poor” on the Barracuda Reputation System.
Pros:
- Integrated with broader security services, reliable and well-established.
Cons:
- Better suited for users seeking comprehensive security solutions rather than standalone blacklist removal.
Full Guide: Barracuda blacklist: How To Remove your IP from it
6. DNSBL
DNSBL provides a simple, no-frills approach to blacklist checking, focusing primarily on email-related blacklists. It’s a good choice when you need a quick answer without navigating a complex interface.
How to check your IP:
- Access the DNSBL website.
- Enter your IP address in the input field and click “Check This IP.”
- You’ll see a clear list showing which blacklists include your IP and which do not.
Pros:
- Simple and easy to use
- Ideal for quick checks.
Cons:
- Limited in functionality and depth of information compared to more robust tools.
Full Guide: DNSBL Blacklist: Everything You Need to Know
7. Whatismyip’s Tool
Whatismyip’s IP blocklist checker offers a quick and accessible way to see if your IP is listed on major blacklists. What sets it apart is its ability to scan across both DNS blocklists and SURBLs (Spam URI Realtime Blocklists) which are databases that specifically track domains commonly found in unsolicited emails.
How to check your IP:
- Visit the Whatismyip website.
- Type your IP or domain into the search area and initiate the scan.
- Results will indicate whether your IP or domain appears on any DNS blocklists or SURBLs.
Pros:
- Easy to use
- Delivers instant results
- Covers both IP and domain checks.
Cons:
- Basic functionality
- Lacks in-depth analysis or direct delisting support.
8. DNSChecker
DNSChecker is a reliable and versatile tool that scans your IP against more than 50 blocklists, presenting results in a clean, easy-to-read table. Beyond blacklist checking, it also offers MX record checkers, DNS health analyzers, and a range of other network diagnostics—making it a useful all-in-one resource for email and network management.
How to check your IP:
- Go to the DNSChecker website.
- Enter your IP in the search field and run the check.
- DNSChecker will display a clear overview of your IP’s status across all checked blocklists.
Pros:
- Versatile and user-friendly
- Covers a wide range of network and email checks beyond just blacklists.
Cons:
- The breadth of tools available may be more than needed if you’re only looking for a straightforward blacklist check.
9. MultiRBL
MultiRBL offers comprehensive checks against a wide range of RBLs (Real-time Blackhole Lists) and DNSBLs (DNS-based Blackhole Lists), giving you one of the broadest views of your IP’s standing available in a single tool. It also allows you to test your email sending capability directly from its servers, a useful bonus for assessing real-world deliverability.
How to check your IP:
- Access the MultiRBL website.
- Enter your IP to check its status across multiple blacklists simultaneously.
- Optionally, use the email sending test to assess your delivery effectiveness directly.
Pros:
- Checks against a wide range of blacklists, thorough and detailed results.
Cons:
- The volume of data returned can be overwhelming
- Better suited for advanced users comfortable interpreting technical output.
Full Guide: MultiRBL Blacklist: A Comprehensive Guide to Delisting
10. Spamcop
Spamcop is a widely used tool for spam reporting that also allows users to check whether their IP has been blacklisted due to spamming activity. It works by assessing the volume of spam reports and spam traps linked to your IP. A higher count directly damages your IP’s reputation and increases the likelihood of blacklisting.
How to use Spamcop:
- Use Spamcop to review the extent of spam reports associated with your IP.
- The tool also provides guidance for delisting your IP and domain, offering a clear pathway to restoring your sender reputation.
Pros:
- Effective for identifying and reporting spam
- Useful for understanding the root cause of why an IP was blacklisted.
Cons:
- Focuses more on spam reporting than on direct, hands-on blacklist removal assistance.
Full Guide: SpamCop Blacklist: How To Remove your IP from it
What are the advantages of using IP blacklist removal tools?
- Improved email deliverability. An improved email deliverability ensures that an IP address is not blacklisted and emails are less likely to be flagged as spam or blocked by ISPs. It results in a higher email success rate that allows a sender to reach the intended recipient down to their inbox.
- Enhanced reputation and trustworthiness. IP blacklist removal tools also solidifies your email domain reputation. Preserving your reputation is critical for business and many professionals as it establishes trust and confidence among clients and partners.
- Reduction in spam and malicious activities. Continuous use of IP blacklisting tools reduces spam and other malicious email activities, since it provides insights and recommendations on what can be the best practices for sending emails.
15 tips to prevent your IP from being blacklisted
The following are some of the best prevention protocols you can employ to protect your IP from being blacklisted, and how IP blacklist removal tools can help.
1. Do not skip email warmup
One of the most common causes of IP blacklisting is sending large volumes of emails from a new email address or IP. Without an established sending history, ISPs have no reputation to evaluate. This makes new senders particularly vulnerable to being flagged.
Gradually increasing your email sending volume is the most reliable way to build credibility with ISPs and email service providers, which is why email warmups are a foundational best practice for anyone starting fresh.
You can run a manual warmup process, but this is time-consuming and easy to get wrong. Tools like Warmy.io remove the guesswork by automating the process while simulating authentic email interactions. With customizable warmup schedules and AI-driven optimizations built in, Warmy ensures your warmup is both effective and efficient without requiring constant manual oversight.
 2")
2. Use opt-in lists
The most effective way to avoid spam complaints is simple: only send emails to people who have explicitly asked to receive them. Unsolicited emails (even well-designed ones) generate complaints, and complaints lead to blacklisting.
It is also important to understand that email marketing is governed by law. Familiarizing yourself with the CAN-SPAM Act in the United States and GDPR regulations in the European Union will give you a clear picture of what constitutes lawful email communication and what crosses the line into unsolicited outreach.
3. Proper authentication of your emails
Email authentication tells ISPs that your emails are genuine and that you are not a bad actor spoofing a domain. Without it, even legitimate emails can be flagged as suspicious, and your IP becomes vulnerable to blacklisting.
The three core protocols every sender should have in place are SPF, DKIM, and DMARC:
- SPF verifies which mail servers are authorized to send on your domain’s behalf.
- DKIM attaches a cryptographic signature to your emails to confirm they haven’t been tampered with in transit.
- DMARC builds on both by telling ISPs what to do when either check fails — and gives you reporting visibility into how your domain is being used.
Setting these up doesn’t have to be complicated.
Warmy’s free SPF Record Generator helps prevent email spoofing and ensures recipients can trust where your emails are coming from. Its free DMARC Generator further strengthens your authentication setup by building on your existing SPF and DKIM configuration.
 3")
4. Ensure quality content and avoid spam triggers
Even a technically sound email setup can undermine your sender reputation if the content itself raises red flags. Spam filters are becoming more and more sophisticated. They analyze not just keywords, but structure, formatting, link patterns, and engagement history.
Many senders unknowingly adopt habits that ISPs and spam filters interpret as suspicious. Even if your intentions are legitimate, certain behaviors can trigger automated blacklisting systems.
Common spam behaviors to avoid:
- Using spam trigger words: Phrases like “FREE!!!”, “Act Now”, “Guaranteed”, or “No risk” in subject lines and body copy are red flags for spam filters.
- Misleading subject lines: Clickbait that doesn’t match the email content increases complaint rates and destroys trust.
- Sending too frequently: Bombarding subscribers overwhelms them and drives up unsubscribe and complaint rates.
- Using URL shorteners: Shortened links like bit.ly are often associated with phishing and may trigger spam filters.
- Attaching large files: Heavy attachments raise red flags with ISPs. Use links to hosted content instead.
- Inconsistent sender names: Frequently changing your “From” name confuses recipients and reduces trust.
- Poor text-to-image ratio: Emails that are mostly images with little text are a classic spam pattern. Aim for a balanced layout.
Before sending to your list, use Warmy’s Free Template Checker to evaluate your email’s performance. It gives you a clear read on how your template is likely to perform across different filters and platforms, so you can fix issues before they cost you deliverability.
 4")
5. Avoid purchasing email lists
Buying email lists might seem like a shortcut to a larger audience, but it almost always backfires. Purchased lists are typically riddled with invalid addresses, spam traps, and contacts who have never heard of your business. This is a lethal combination that generates high bounce rates, spam complaints, and a fast track to blacklisting.
That said, if you need external addresses to test your email performance or to conduct your warmup, Warmy’s Seed Lists offer a legitimate and top-quality alternative.
 5")
Unlike purchased lists, Warmy’s seed lists are curated, genuine email addresses from Gmail, Outlook, and Yahoo that act as controlled test recipients. This allows you to evaluate your email’s performance across different platforms and filters before your real campaign goes out. It’s also a smart way to improve deliverability without putting your sender reputation at risk.
6. Monitor your engagement metrics
Engagement metrics are your earliest warning system. When open rates drop, click-throughs decline, or unsubscribe rates spike, it usually means your emails are landing in spam folders. Or worse, not arriving at all.
Key metrics to watch:
- Open rate: A sudden drop often signals deliverability issues or spam filtering.
- Click-through rate (CTR): Low CTR may indicate poor list quality or content relevance.
- Bounce rate: High hard bounces mean your list contains invalid or inactive addresses.
- Spam complaint rate: Keep this below 0.1%. Anything higher puts your IP at risk.
- Unsubscribe rate: A spike here often reflects disengaged subscribers or overly frequent sending.
7. Do a thorough list cleaning
A dirty email list is one of the fastest ways to get blacklisted. Over time, lists accumulate invalid addresses, spam traps, and inactive users. All of these hurt your sender reputation.
Best practices for list cleaning include:
- Removing hard bounces immediately
- Suppressing long-term inactive subscribers
- Identifying and removing spam traps
- Segmenting by engagement
8. Check if your email is properly configured
Even a well-crafted email campaign can fail if your technical setup is flawed. Misconfiguration is a silent culprit behind many blacklisting incidents because it makes your emails look suspicious to ISPs, even when your intentions are legitimate.
9. Comply with ISP regulations
Internet Service Providers operate under strict guidelines to protect their users from spam and malicious content. Failing to comply with these rules can result in your IP being flagged or blocked outright.
Key regulations to follow:
- CAN-SPAM Act
- GDPR (General Data Protection Regulation)
- CASL (Canada’s Anti-Spam Legislation)
Beyond legal compliance, it’s a must to follow each ISP’s bulk sender guidelines. Google, Yahoo, and Microsoft have all published updated requirements for bulk senders. This includes mandatory authentication (SPF, DKIM, DMARC) and low spam complaint thresholds. Non-compliance can lead to emails being silently filtered or your domain being blocked entirely.
10. Respond to spam complaints
Every spam complaint is a signal. When you ignore enough of them, your IP will pay the price. ISPs track complaint rates closely, and a reputation for unresolved abuse reports can accelerate blacklisting significantly.
How to handle complaints effectively:
- Act fast. Address abuse reports within 24 hours where possible.
- Honor unsubscribe requests immediately. Delaying opt-outs is both a legal violation and a reputation risk.
- Investigate the root cause. Was it a purchased list? A misconfigured automation? Identify and fix it.
- Maintain an abuse@ email address. Many ISPs expect this to be active and monitored.
- Keep a complaint log. Tracking patterns helps you identify recurring issues before they escalate.
A single complaint won’t typically blacklist you, but a pattern of unresolved ones will. Treat every complaint as an opportunity to improve your process.
11. Establish a positive relationship with ISPs
Most businesses treat ISPs as gatekeepers or obstacles to avoid. Building a cooperative relationship with them is one of the most underrated (yet most effective) strategies for protecting your IP reputation.
Ways to establish goodwill with ISPs:
- Maintain consistent sending volumes. Sudden spikes in email volume trigger spam filters. Gradual, predictable growth builds trust.
- Register with ISP whitelists. Some ISPs offer whitelisting programs for senders who meet their quality standards.
- Enroll in postmaster tools. Google Postmaster Tools and Microsoft’s SNDS (Smart Network Data Services) give you direct insight into how ISPs view your sending reputation.
- Follow their bulk sender guidelines. Each major ISP publishes documentation on what they expect from high-volume senders. Read and follow them.
- Respond to ISP feedback loops. When ISPs notify you of complaints, act on them promptly to demonstrate accountability.
12. Verify your emails before sending
Sending to unverified addresses is one of the most avoidable causes of blacklisting. Invalid addresses generate hard bounces, and hitting too many of them in a single campaign can immediately damage your sender score.
How to verify your email list:
- Use an email verification service: Tools that can check whether addresses are valid, active, and safe to send to before you hit send.
- Verify at the point of capture: Add real-time verification to your signup forms so invalid addresses never enter your list in the first place.
- Check for syntax errors: Simple typos like “gmial.com” or missing “@” symbols can be caught with basic validation.
- Flag role-based addresses: Addresses like info@, admin@, or support@ often belong to groups rather than individuals and tend to generate higher complaint rates.
- Re-verify dormant lists: If a list hasn’t been used in six months or more, verify it again before sending.
 6")
13. Monitor your IP regularly
You cannot fix a problem you don’t know exists. Regular IP monitoring ensures that if your address does appear on a blacklist, you catch it early before it compounds into a larger deliverability crisis.
A practical starting point is Warmy’s free Email Deliverability Test, which gives you an immediate snapshot of your sender reputation and flags any deliverability issues tied to your IP or domain. For ongoing monitoring, here’s how to stay on top of it:
 7")
- Use blacklist monitoring tools: These services and tools mentioned above check your IP against hundreds of blacklists simultaneously. Warmy’s dashboard complements these by consolidating your reputation data in one place, so you’re not manually cross-referencing multiple platforms.
- Set up automated alerts: Many monitoring tools offer real-time notifications so you’re alerted the moment your IP is flagged. The sooner you know, the faster you can act.
- Monitor your sending domain alongside your IP: Blacklisting can occur at the domain level too. Check both your IP and domain health regularly, not just one or the other.
- Schedule regular checks: Even if nothing seems wrong, run a manual check at least once a week and always before a major campaign. Warmy’s ongoing monitoring makes this easier by keeping a continuous watch so routine checks become less of a manual burden.
14. Employ security measures
Sometimes your IP gets blacklisted not because of anything you did, but because your server was compromised without your knowledge. Hackers frequently use vulnerable mail servers to send spam at scale and your IP takes the blame.
Essential security measures to implement:
- Keep your mail server software updated. Outdated software is the most common entry point for attackers.
- Use strong authentication protocols. Enforce multi-factor authentication (MFA) for all accounts with access to your email infrastructure.
- Install and maintain a firewall. Block unauthorized access to your mail server ports.
- Scan regularly for malware.Use reputable security software to detect and remove threats before they cause damage.
- Limit relay permissions. Configure your mail server to prevent open relay, which allows anyone to send email through your server.
- Audit user access regularly. Remove access for former employees or inactive accounts immediately.
- Use TLS encryption. Encrypting email in transit protects against interception and signals trustworthiness to ISPs.
15. Enroll in feedback loops
Feedback loops (FBLs) are programs offered by major ISPs that notify you when a recipient marks your email as spam. Rather than finding out weeks later through declining metrics, you get a direct, real-time signal that something is wrong.
How to make the most of feedback loops:
- Sign up with major ISPs. Microsoft (JMRP and SNDS), Yahoo, and AOL all offer feedback loop programs. Apply through their postmaster portals.
- Automate suppression. When a complaint comes in through an FBL, immediately remove that address from your active list.
- Analyze complaint patterns.If complaints spike after a particular campaign or from a specific segment, investigate why before sending again.
- Use FBL data alongside engagement metrics. Combining both gives you a fuller picture of your sender health.
- Maintain a clean FBL address. ISPs send notifications to a designated address. Make sure it’s monitored and not buried in a shared inbox.
Preserve your credibility with email deliverability and IP blacklist removal tools
IP blacklisting doesn’t announce itself. It happens quietly. Emails stop landing, open rates fall, campaigns underperform… By the time most businesses notice, the damage has already been done.
The good news is that blacklisting is largely preventable. The 15 strategies covered in this guide — from warming up your IP and authenticating your emails to cleaning your list and enrolling in feedback loops — give you a comprehensive framework for keeping your sender reputation clean and your emails where they belong: in the inbox.
That said, there is no single tool that eliminates blacklisting risk entirely. What protects your IP in the long run is:
- Consistency
- Maintaining clean lists
- Following authentication best practices
- Monitoring your metrics
- Treating every complaint as a signal worth investigating
If you’re not sure whether your IP is clean, the fastest first step is Warmy’s free Email Deliverability Test. It takes less than 30 seconds and checks your IP and domain against major blacklists alongside your full authentication setup.
If you’re ready to start your email deliverability journey, start by signing up for your free 7-day trial at Warmy.
FAQ
How do I know if my IP address is blacklisted?
You can check your IP status using tools like Warmy’s free Email Deliverability Test, MxToolbox, or Spamhaus. Signs that your IP may already be blacklisted include sudden drops in open rates, emails bouncing unexpectedly, or messages landing in spam folders instead of the inbox. Regular monitoring is the most reliable way to catch blacklisting early.
How long does it take to get removed from an IP blacklist?
It depends on the blacklist operator. Some, like Barracuda, process delisting requests within 12–24 hours once submitted. Others, like Spamhaus, require you to resolve the underlying issue first before a request is even considered. In general, the sooner you catch the blacklisting and act on it, the faster your recovery will be.
Can I remove my IP from a blacklist automatically?
No. There is no tool that can automatically remove your IP from a blacklist. Every blacklist operator runs its own delisting process, which typically involves identifying and fixing the root cause, then submitting a manual removal request. Tools like Warmy help you diagnose the issue and prepare for that process, but the delisting itself always requires direct action on your part.
What is the most common reason an IP gets blacklisted?
The most common causes are sending unsolicited emails, high spam complaint rates, sudden spikes in email volume from a new or unknown IP, and compromised mail servers being used to send spam without the owner’s knowledge. Poor email authentication — missing SPF, DKIM, or DMARC records — is also a frequent contributing factor.
Does being blacklisted permanently damage my sender reputation?
Not necessarily. Most blacklistings are recoverable if you act quickly, fix the underlying issue, and follow each blacklist’s delisting process. However, repeated blacklistings or prolonged periods of inaction can cause lasting damage to your domain reputation with ISPs. The best protection is consistent monitoring and good sending practices from the start.