Setting up SPF, DKIM, and DMARC for Kit (formerly ConvertKit) protects your domain from spoofing and is required for inbox placement with major providers. Since February 2024, Google and Yahoo require bulk senders (5,000+ messages per day) to authenticate emails with SPF, DKIM, and DMARC, per Google’s Email Sender Guidelines. As of November 2025, non-compliant emails face temporary delays and permanent rejections from Gmail. This guide covers the exact DNS records and steps Kit requires, using the current Verified Sending Domain setup flow.
Understanding Email Authentication Protocols
SPF, DKIM, and DMARC are three DNS-based protocols that work together to verify your emails are legitimate and protect your domain from spoofing.
- SPF (Sender Policy Framework) is a DNS TXT record that lists the servers authorized to send email on your behalf. When a receiving server gets a message from your domain, it checks whether the sending IP appears in your SPF record. See Google’s SPF setup guide for the technical specification.
- DKIM (DomainKeys Identified Mail) adds a cryptographic signature to every outgoing email. The receiving server verifies this signature against a public key published in your DNS. A valid signature confirms the message was not altered in transit. See Warmy’s guide on understanding DKIM selectors for more on how DKIM keys are structured.
- DMARC (Domain-based Message Authentication, Reporting, and Conformance) ties SPF and DKIM together by specifying what receiving servers should do when authentication fails and where to send reports. The DMARC standard is defined in RFC 7489 by the IETF. For Kit users, DKIM is the primary path to DMARC compliance, because Kit uses its own envelope sender domain for outgoing mail, which means SPF alignment will not pass DMARC. This is expected behavior, not a misconfiguration.
Prerequisites for Kit Email Authentication Setup
Before you begin, confirm you have the following in place.
1. Access to Your Kit Account
You need active administrative access to your Kit account. This is where you will retrieve the CNAME records required for authentication.
2. Access to Domain DNS Settings
Confirm you can modify your domain’s DNS records. This typically means access to your domain registrar’s control panel (GoDaddy, Namecheap, Cloudflare, and similar). If Cloudflare manages your DNS, CNAME records for Kit must be set to DNS Only (grey cloud). Proxied CNAMEs break DKIM verification.
Gathering the Information You Need
Kit’s Verified Sending Domain flow generates all the CNAME records you need during setup. You do not need to obtain SPF records separately. Kit does not use a traditional include: TXT record on your root domain. The VSD flow handles SPF delegation automatically via a CNAME subdomain. Review your existing DNS records before starting to avoid conflicts with existing entries.
Setting Up SPF in Kit
Kit uses a CNAME-based SPF delegation model. Your root domain SPF record does not change. Instead, Kit creates a subdomain (ckespa.yourdomain.com) as the envelope sender for your outgoing mail, with Kit serving the SPF record from their side via that CNAME.
Accessing Kit’s Verified Sending Domain Settings
- Click your account name at the top right of the Kit dashboard.
- Select Settings, then click Email in the left sidebar.
- Under the Verified Sending Domains section, click Set up your Verified Sending Domain.
- Enter the domain you want to verify and click Next.
Kit displays the CNAME records you need to add to your DNS. Kit also offers an automatic setup option via Entri for most major DNS providers. Click Set this up for me and authorize your DNS provider; Kit will detect your provider and add the records automatically.
Adding the SPF Delegation CNAME
Kit provides a CNAME record for SPF delegation:
Type: CNAME
Host: ckespa (creates ckespa.yourdomain.com)
Value: provided by Kit, unique to your account
Add this record to your DNS provider. Your root domain v=spf1 TXT record is unaffected. Because Kit uses a subdomain as the envelope sender, there is nothing to merge into your existing SPF record.
If you use Cloudflare, set this CNAME to DNS Only (grey cloud). A proxied CNAME will prevent Kit from verifying the record and will cause SPF delegation to fail.
Verifying the SPF CNAME
After adding the CNAME, return to Kit and click Verify. DNS changes can take up to 48 hours to propagate globally, though most providers update within a few hours. If verification fails initially, wait and retry. If the issue persists after 48 hours, confirm the CNAME was added correctly and that no proxy is enabled.
Not sure if your Kit authentication is set up correctly? Run a free Email Deliverability Test to check your SPF, DKIM, and DMARC records, inbox placement, and blacklist status in one pass: Run the free test now
Implementing DKIM in Kit
DKIM is the critical authentication layer for Kit users. Because Kit’s SPF alignment does not pass DMARC, DKIM is what enables your emails to pass DMARC. Setting it up correctly is required for compliance, not optional.
Getting Your DKIM CNAME Records from Kit
Kit provides CNAME-based DKIM records as part of the Verified Sending Domain flow. Kit does not generate TXT-based DKIM keys for you to copy manually. The CNAME approach means Kit manages the DKIM keys on their side, and your DNS simply points to their infrastructure.
During the VSD setup flow, Kit provides:
Type: CNAME
Host: cka._domainkey (creates cka._domainkey.yourdomain.com)
Value: provided by Kit, unique to your account
Adding the DKIM CNAME to Your DNS
- Log in to your domain registrar or DNS provider.
- Navigate to the DNS management section.
- Create a new CNAME record with the Host and Value provided by Kit.
- Set TTL to 3600 seconds (1 hour) or the lowest available value.
- Save your changes.
If you use Cloudflare, ensure the CNAME is set to DNS Only (grey cloud). A proxied CNAME will cause DKIM verification to fail consistently.
Verifying Your Verified Sending Domain
After adding both CNAME records, return to Kit and click Verify. Once Kit confirms both records have propagated, your Verified Sending Domain is active.
You may see a temporary drop in open rates after activation. Mailbox providers re-evaluate your sender reputation when your return-path, DKIM signing domain, or sending IP changes. This typically resolves within two to three weeks of consistent sending through your verified domain.
Configuring DMARC for Kit
DMARC uses your DKIM and SPF authentication results to tell receiving servers how to handle messages that fail authentication. For Kit users, DMARC compliance comes through DKIM alignment. Your DKIM signing domain must match your From domain.
Understanding DMARC Policy Options
| Policy | What happens | When to use |
|---|---|---|
| p=none | Emails are delivered normally; aggregate reports are generated | Start here. Monitoring only, no emails blocked. |
| p=quarantine | Failing emails are sent to the spam or junk folder | After reviewing reports for at least 4 weeks |
| p=reject | Failing emails are blocked entirely at the receiving server | Only when all legitimate sending sources are verified and passing |
Creating Your DMARC Record
A basic DMARC record for Kit looks like this:
v=DMARC1; p=none; rua=mailto:dmarc-reports@yourdomain.comThe rua tag is where aggregate DMARC reports are sent. Always include it. A DMARC record with no rua address generates no reports and gives you no visibility into authentication health. Kit’s auto-generated DMARC record sometimes omits this tag, so verify your record includes a reporting address after setup.
Adding the DMARC Record to Your DNS
- Log in to your domain registrar or DNS management platform.
- Create a new TXT record: Name/Host: _dmarc | TTL: 3600 | Value: v=DMARC1; p=none; rua=mailto:dmarc-reports@yourdomain.com
- Save your changes. DNS propagation can take up to 48 hours.
Gradually Strengthening Your DMARC Policy
Start with p=none and move toward p=reject in stages:
- Weeks 1–2:
v=DMARC1; p=none; rua=mailto:dmarc-reports@yourdomain.com— monitoring only, no email affected. - Weeks 3–6:
v=DMARC1; p=quarantine; pct=10; rua=mailto:dmarc-reports@yourdomain.com— quarantine applies to 10% of failing emails. - Weeks 7–10:
v=DMARC1; p=quarantine; pct=50; rua=mailto:dmarc-reports@yourdomain.com— increase gradually. - Weeks 11–14:
v=DMARC1; p=quarantine; rua=mailto:dmarc-reports@yourdomain.com— full quarantine on all failing mail. - Week 15+:
v=DMARC1; p=reject; rua=mailto:dmarc-reports@yourdomain.com— only when all legitimate sending sources are verified and passing.
Pro Tip: Do not move to p=reject until you have reviewed at least 4 weeks of DMARC reports. Reports frequently expose forgotten services, such as old CRMs, transactional email tools, or payment processors, that send email on your behalf. A p=reject policy will silently block those emails the moment you enforce it.
Troubleshooting Common Issues
SPF Record Conflicts
Kit’s CNAME-based SPF setup means your root domain SPF record should not change. If you are seeing SPF failures in DMARC reports, the most likely cause is:
Too many DNS lookups: The SPF specification limits you to 10 DNS lookups per evaluation. Exceeding this limit causes SPF to fail silently. Flatten your record by replacing include: statements with direct IP addresses where possible.
DKIM Verification Failures
- Incorrect CNAME record: Verify the Host and Value in your DNS match exactly what Kit provided in the VSD setup flow.
- Cloudflare proxy enabled: If the CNAME has an orange cloud (proxied), DKIM verification will fail. Switch to DNS Only (grey cloud).
- CNAME propagation delay: Wait up to 48 hours before concluding that verification has failed.
- Domain mismatch: The From address must match the domain you verified in Kit. Sending from a different domain causes DKIM alignment to fail.
DMARC Report Interpretation
- High SPF failure rate: Expected for Kit emails. This does not prevent DMARC compliance if DKIM is passing and aligned.
- High DKIM failure rate: Consistent DKIM failures indicate a CNAME misconfiguration or a domain mismatch between the VSD and the From address.
- Unexpected sending sources: DMARC reports reveal services sending email using your domain that you did not configure. Investigate each one before tightening your policy.
Advanced Considerations in Email Authentication
Email Warmup and Sender Reputation
Setting up SPF, DKIM, and DMARC tells mailbox providers that your emails are legitimate, but authentication alone does not build your sender reputation. Reputation is earned through consistent sending behavior: low bounce rates, high engagement, and low spam complaint rates.
Warmy is an AI-driven email warmup and deliverability platform that automatically builds your sender reputation by simulating real engagement across a network of over 1 million real mailboxes. Adeline AI, Warmy’s proprietary warmup engine, builds a personalized warmup schedule for each mailbox and gradually increases send volume while generating genuine engagement signals across 30+ languages. This matters especially for Kit users, because Kit sends through shared IP infrastructure, meaning your deliverability can be influenced by other senders on the same IP pool. Learn more about improving Kit email deliverability.
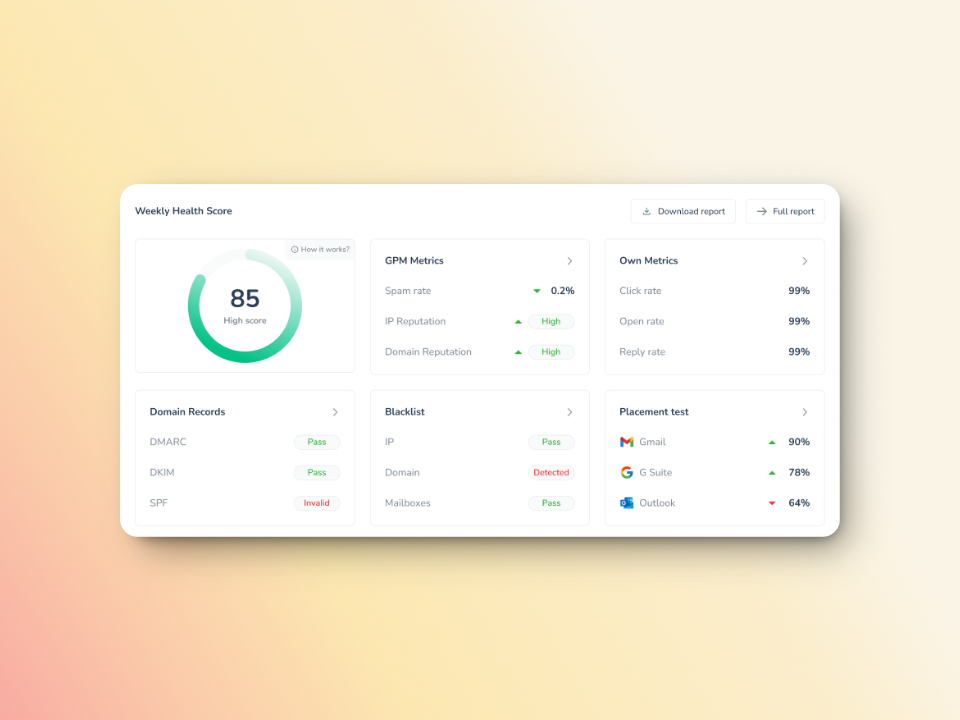
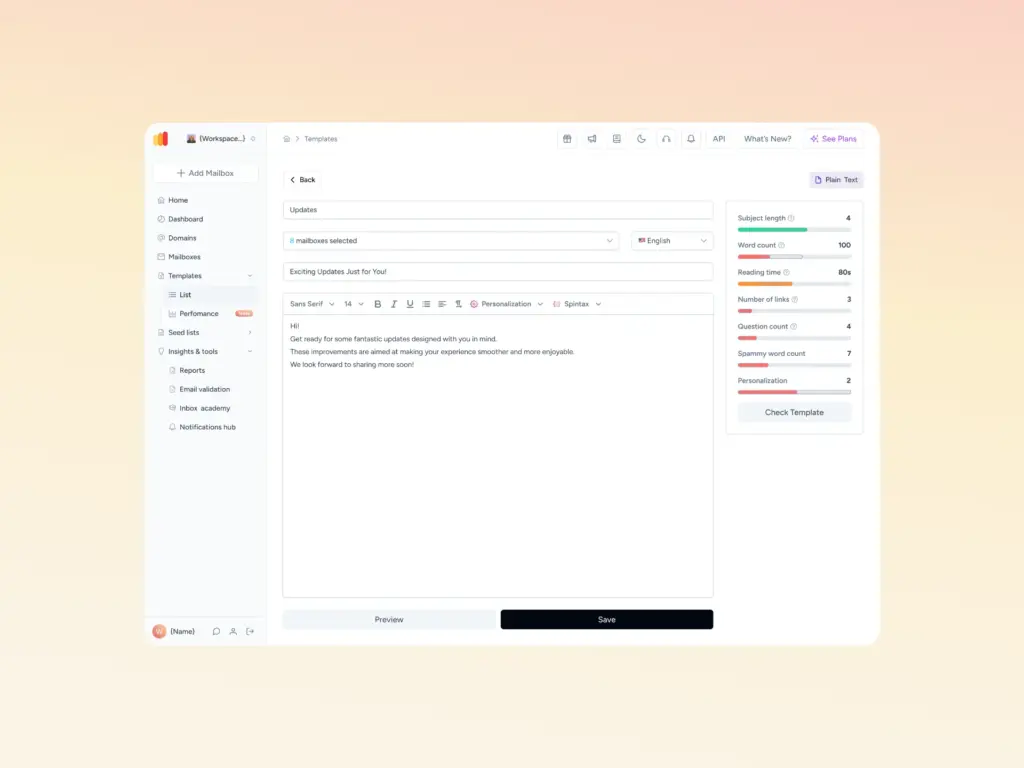
Warmy’s free Email Deliverability Test checks inbox placement across Gmail, Outlook, and Yahoo, verifies your SPF, DKIM, and DMARC records, and scans your domain against major blacklists in one pass. If you want to check your email content for spam triggers before sending, the Template Checker scans your subject line, body copy, and formatting and returns a spam score with specific fixes.
Integrating Kit with Other Email Services
When using Kit alongside other email services, each one requires its own authentication configuration:
- Consistent SPF: Add each additional sending service to your root domain SPF TXT record. Kit handles its own SPF separately via the VSD CNAME, so it does not affect your root SPF.
- DKIM per service: Each sending service should have its own DKIM keys configured and aligned with the From domain.
- Unified DMARC reporting: Point all services to a single rua= address so you can monitor authentication across all senders from one place.
- Domain alignment: Your From address must match the domain you have authenticated in each service.
For a roundup of tools that help you analyze DMARC reports across multiple services, see top DMARC reporting and monitoring tools for 2026. For a broader look at why these protocols work together, see why you need to configure SPF, DKIM, and DMARC.
Handling Subdomains
By default, subdomains inherit the DMARC policy of the organizational domain. To override this, use the sp= tag in your root DMARC record:
v=DMARC1; p=reject; sp=quarantine; rua=mailto:dmarc@yourdomain.comHere the root domain uses p=reject while subdomains use p=quarantine. For granular control, create separate DKIM records for each subdomain used for sending.
Conclusion
Setting up SPF, DKIM, and DMARC for Kit is a one-time configuration that protects your domain and strengthens deliverability for every campaign you send. The most important distinction to understand is that Kit’s CNAME-based Verified Sending Domain flow is different from most ESP guides: you are adding CNAME records, not TXT records, and your root SPF record stays unchanged. DKIM is the authentication method that makes DMARC work for Kit users. It is your primary compliance tool and the reason the VSD setup is required rather than optional.
Review your DMARC reports regularly, build sender reputation consistently, and tighten your enforcement policy gradually. Authentication establishes legitimacy. Sustained deliverability requires ongoing attention to reputation, engagement, and list hygiene.
Start your free Warmy trial and let Warmy’s AI build your sender reputation automatically, no credit card required. Or book a demo to see how Warmy protects your domain at scale.