TL;DR: UCEPROTECTL2 is a subnet-level blacklist that flags entire IP ranges, not individual senders, when too many IPs in the same network get flagged at Level 1. If your IP lands here, the cause is usually your host’s network, not your own sending. Removal is automatic once the range cleans up.
UCEPROTECTL2 blacklists a whole block of IP addresses belonging to your host or ISP, so you can end up listed even if you have never sent a single spam message yourself. For most senders it has little practical effect on Gmail, Outlook, or Microsoft 365 deliverability, since those providers rely on their own reputation systems rather than external blacklists.
You cannot request removal directly. Only your hosting provider can fix the underlying issue, and listings clear automatically once the netblock’s spam count drops back below UCEPROTECT’s own threshold for that range, which UCEPROTECT does not publish as a fixed number of days.
What is Uceprotectl2 IP blacklist?
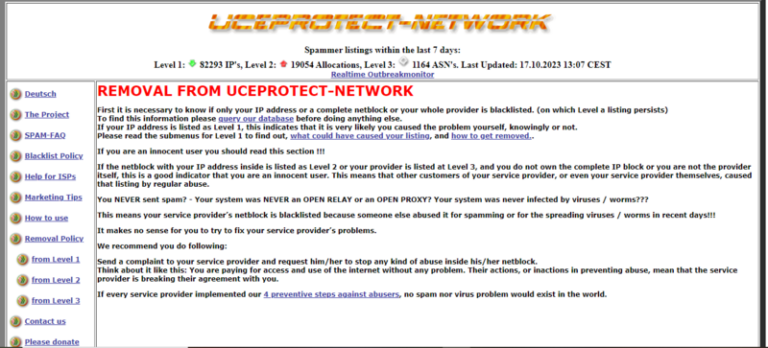
UCEPROTECT is a blacklist network designed to reduce spam and protect email users from unwanted messages. It has three levels of severity: UCEPROTECT Level 1 targets individual IPs involved in spamming, UCEPROTECT Level 2 is stricter, focusing on larger groups of IPs with spam associations, and UCEPROTECT Level 3 covers entire network providers linked to spam activity.
If your IP lands on UCEPROTECT Level 2 (L2), many email providers may block your messages, hurting your deliverability and business reputation.
In this guide, we’ll explain why IPs get listed on UCEPROTECT L2, how to address the issue, and steps to remove your IP so you can restore email performance.
Does UCEPROTECTL2 Actually Hurt Your Email Deliverability?
For most senders, the practical impact is smaller than the alarm of seeing your IP on a blacklist suggests. Gmail and Microsoft 365 make inbox placement decisions using their own proprietary reputation signals, engagement data, and authentication checks rather than deferring to third-party DNS blacklists like UCEPROTECTL2.
Gmail’s sender guidelines confirm that spam classification is driven primarily by recipient engagement and authentication compliance. Microsoft has published similar sender requirements for Outlook, centered on SPF, DKIM, and DMARC compliance rather than external RBL status.
Pro Tip: If Gmail and Outlook are your main recipients, spend your time first on SPF, DKIM, and DMARC alignment and on warming up your sending reputation. A UCEPROTECTL2 listing matters more if you send to smaller ISPs, self-hosted mail servers, or B2B recipients whose spam filters actively check third-party blacklists.
That does not mean you should ignore the listing. A netblock ending up on UCEPROTECTL2 often signals a genuine abuse problem inside your host’s infrastructure, and it is worth confirming your own sending is clean and pushing your provider to fix it.
Why IPs Get Blacklisted on UCEPROTECTL2
Several distinct issues can trigger a Level 2 listing, most of them tied to shared infrastructure rather than your own campaigns. If your emails are landing in spam for reasons beyond a single blacklist, Warmy’s guide on why emails go to spam or junk covers the broader set of causes.
1. Compromised mail server
If your mail server has been hacked, it can be used to send spam without your knowledge. When this happens, the IP of the compromised server is often blacklisted, and if enough IPs in the same range are affected, the listing escalates to Level 2.
2. Unsecured mailing scripts
Unprotected mailing scripts on websites can be exploited by spammers to send bulk emails. This misuse can lead to your IP being blacklisted.
3. Misconfigured Mail Transfer Agent (MTA)
If your MTA settings aren’t properly configured, it may cause a flood of bounce messages and false positives, which can trigger blacklisting.
4. Use of dynamically assigned IP addresses
If you’re using a dynamic IP, it might have been previously used by a spam sender, causing it to be blacklisted before you even got it.
5. Purchasing email lists
Email lists bought from third parties often contain addresses of people who haven’t opted in, leading to complaints and potential blacklisting.
UCEPROTECT Level 1 vs Level 2 vs Level 3: What’s the Difference
| Level | Scope | Typical cause | Who can fix it | Auto-delist timing |
|---|---|---|---|---|
| Level 1 | A single IP address | Direct spam or an open relay on that IP | You, by cleaning your server and lists | About 7 days with no new spam |
| Level 2 | An entire netblock (your host’s IP range) | Multiple Level 1 issues accumulating inside the same range | Your hosting provider or ISP | Automatic once the range drops below the listing threshold |
| Level 3 | An entire ASN or provider-wide network | Widespread abuse across many netblocks under one provider | The provider itself, at scale | Automatic, but slower given the larger scope |
It is important to note that being blacklisted in Uceprotectl L2 can result in decreased email deliverability and a negative impact on a business’s reputation.
Steps to Check if Your IP is Blacklisted
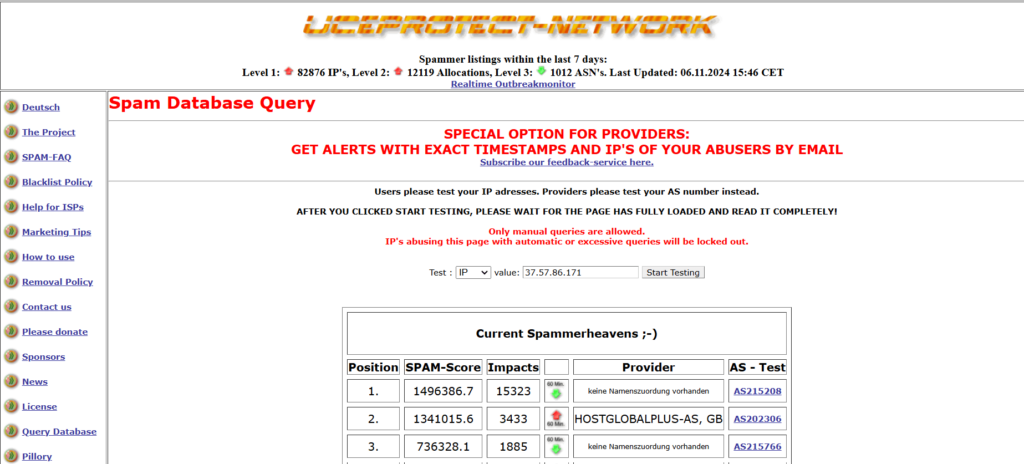
1. Navigate to the UCEPROTECT Website
2. Enter Your IP Address
Once on the site, locate the search bar where you can input your IP address. Type in the address you want to check.
3. Run the Test
Look for a button that says “Start Testing” and click it to begin the search.
4. Review Your Results
After the scan completes, the tool will display your results. If your IP is listed on UCEPROTECT L2, it will be indicated in the results. Review the details to understand the severity and potential impact.
Alternative Option: Use Warmy.io’s Blacklist Checker
If you’re managing multiple IPs or need frequent checks, Warmy.io offers a fast, user-friendly tool to monitor your IP status across various blacklists. It’s a reliable option to help you stay proactive with your email reputation.
Regular checks are essential for maintaining a positive email sender score, especially if deliverability is a priority for your business.
How to Remove Your IP from UCEPROTECTL2
Once you know you are listed, UCEPROTECTL2 blacklist removal follows a specific path, and it depends entirely on which level applies to you. For a broader walkthrough that applies across blacklists in general, see Warmy’s guide on how to remove an IP from the blacklist.
Step 1: Check the Level of Your Blacklisting
- Determine if it’s Level 1, 2, or 3: Go to the UCEPROTECT database and enter your IP. This will show you which level your IP is blacklisted on.
- Understand the Cause:
- UCEPROTECT1 means your IP itself has been flagged, likely due to spam or security issues on your end.
- UCEPROTECT2 means your IP is part of a netblock that’s been blacklisted due to other users’ activities.
- UCEPROTECT3 usually indicates your entire service provider is blacklisted because of abuse across their network.
Step 2: Investigate the Cause if You’re on UCEPROTECT1
✅ Identify Spam Sources. Look through your server logs and check if any mailing scripts, open relays, or compromised accounts might be sending spam.
✅ Secure Your Mail Server. Ensure your server configurations are locked down. Disable any unnecessary services and patch vulnerabilities that spammers could exploit.
✅ Review Your Mailing List. Make sure your mailing list only includes people who opted in. Avoid using purchased lists.
Step 3: Address the Issue if You’re on UCEPROTECT2 and UCEPROTECT3
✅ Contact Your Service Provider. If your IP is blacklisted due to abuse by other users in your netblock (Level 2) or due to provider-wide issues (Level 3), contact your provider directly. Explain the problem and request that they address abuse within their network.
✅ Request Abuse Prevention. Inform your provider that their actions, or lack thereof, are impacting your business. Ask them to implement preventive steps against spamming and virus spread.
Step 4: Wait for Automatic Delisting
✅ Automatic Removal in 7 Days. UCEPROTECT L2 automatically removes IPs after seven days, as long as no new spam is detected from your IP. Monitor your IP regularly and avoid sending any spam to expedite delisting.
How to Prevent Future UCEPROTECTL2 Blacklisting

To avoid being listed on the UCEPROTECTL2 Blacklist again, start by regularly monitoring your IP status. This allows you to catch any potential issues early on. Make sure your mail server is secured with no vulnerabilities in your email scripts, which can be targets for abuse. Only use verified email lists; purchased lists often lead to complaints and spam flags, so stick to contacts who have opted in to receive your messages.
Regularly monitor your IP status so you catch issues before they escalate. Keep your mail server secured, patch any vulnerabilities in your email scripts, and stick to verified, opt-in email lists. Purchased lists are one of the fastest routes to a fresh listing. Pair regular blacklist checks with broader inbox placement testing using Warmy’s guide to mastering inbox placement tools and tests.
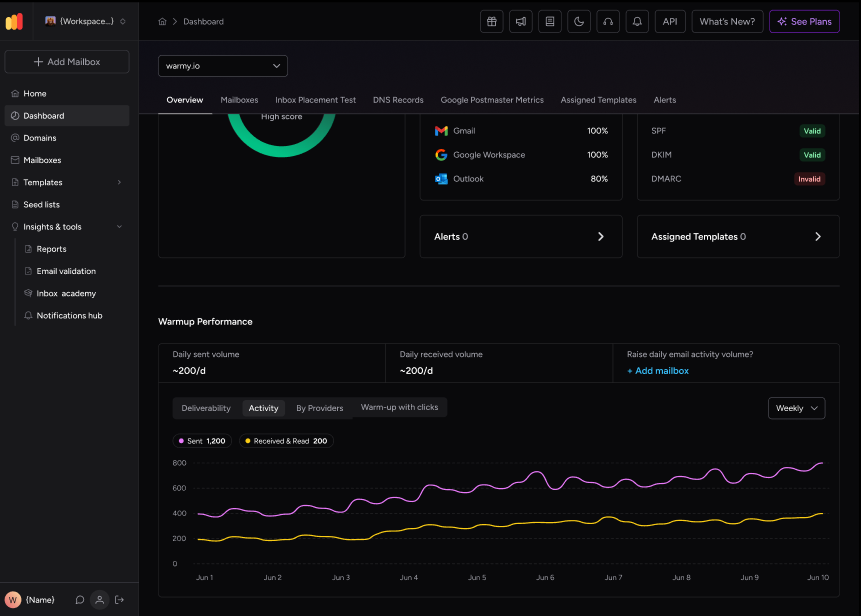
One of the best ways to build a strong sender reputation and reduce the risk of blacklisting is to warm up your emails with Warmy.io. Their automatic, hands-free email warm-up process helps your IP and domain safely build credibility, which directly supports UCEPROTECT L2 blacklist removal efforts and ensures your messages reach inboxes.
Conclusion
In summary, getting caught on the UCEPROTECTL2 Blacklist can seriously impact your email deliverability and business reputation. However, with the right approach, UCEPROTECT L2 blacklist removal is achievable. Start by identifying the cause of the blacklisting, whether it’s related to your server setup, mailing practices, or provider’s network issues. Take immediate steps to secure your server, monitor your IP, and follow best practices for email hygiene.
To prevent future issues, consider using a trusted email warm-up service like Warmy.io, which strengthens your sender reputation and helps avoid blacklisting risks. Regular IP monitoring and professional warm-up practices are essential for keeping your emails out of spam folders and in your recipients’ inboxes.
Try Warmy.io free for 7 days or book a demo to see how it can safeguard your email deliverability.